


A basement can become one of the most useful rooms in a Charlotte, NC home, whether it serves as a family lounge, home office, workout area, guest suite, or hobby space. The strongest projects begin with the conditions below the house, not paint colors or furniture. A qualified basement remodeler in Charlotte, NC, can help homeowners evaluate those conditions before finishes conceal them.
Charlotte’s warm, humid summers and periods of heavy rain make water management especially important for below-grade spaces. A comfortable finished basement in the Charlotte area should feel bright, dry, safe, and easy to maintain through changing weather, not merely look finished on move-in day.
Why Basement Planning Matters in Charlotte
Basements have different constraints than rooms above ground. Concrete walls, lower ceilings, limited daylight, support posts, ductwork, plumbing lines, and electrical equipment can all influence what the final room can become. A thoughtful plan uses those realities instead of fighting them.
Start by deciding how the household will actually use the space. A media room benefits from sound control and flexible seating, while an office needs reliable lighting and quiet. A future bedroom requires more careful attention to emergency escape, privacy, and ventilation than a casual recreation room.
When cracks, stains, damaged wallboard, or worn finishes are already present, arranging drywall repair in Charlotte, NC, after the moisture source has been corrected can help create a clean surface for the next phase of the remodel.
Inspect the Space Before Design
Walk through the basement with a notepad before choosing a layout. Look for water stains, peeling paint, musty odors, white mineral deposits on masonry, damp insulation, and cracks that appear to be changing. Check whether gutters and downspouts direct roof runoff away from the foundation.
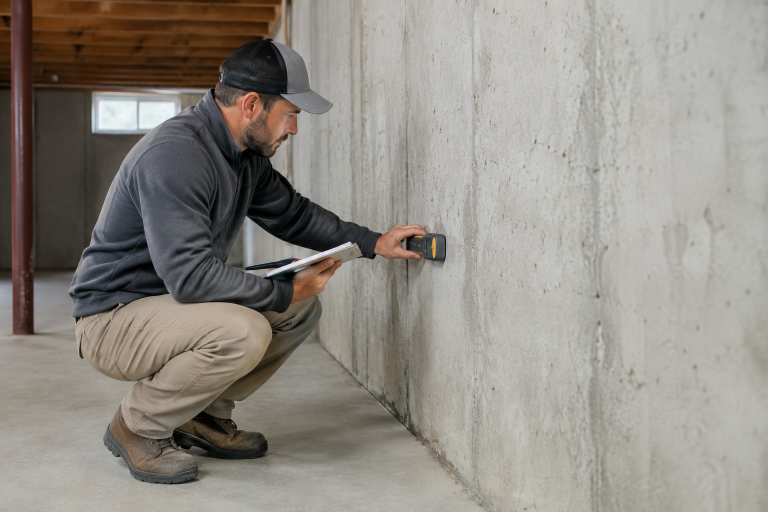
Measure ceiling height after allowing for new flooring, lighting, soffits, and finished ceilings. Locate the electrical panel, main shutoff valves, sump pump, floor drains, furnace or air handler, water heater, windows, and stairs. These items often determine where walls can go and where access panels are needed.
Control Moisture Before Finishing
Drywall, carpet, and cabinetry should never be used to hide an active water problem. Repair plumbing leaks, foundation seepage, and drainage failures first. The EPA notes that moisture problems should be corrected before converting a basement into living space, and its guidance for basement remodeling and indoor air quality also recommends including the basement in the home’s ventilation strategy.
A simple moisture-control checklist
- Keep soil and downspout discharge directed away from the foundation.
- Repair leaks before insulating or closing walls.
- Use a properly sized dehumidifier when the space remains humid.
- Maintain airflow around storage and exterior walls.
- Select flooring that will not trap moisture beneath a thick pad.
Plan for Egress and Safety
Safety decisions belong at the beginning of the project. Any basement sleeping area needs careful review of emergency escape requirements, window dimensions, sill height, and window-well access. Stairs, hallways, and exits should remain clear of furniture and storage.
Smoke alarms, carbon monoxide alarms, handrails, stair lighting, and protection around mechanical equipment should be part of the plan. Local rules can vary by property and scope, so Charlotte homeowners should review the Mecklenburg County code information for finishing basement space and confirm permit requirements before work begins.
Choose a Layout That Fits Daily Life
Place the activities used most often near windows or other natural light when possible. Keep noisy equipment away from offices, bedrooms, and media areas. Half walls, shelving, pocket doors, and curtains can divide zones without making a low-ceiling basement feel crowded.
For example, one open area can function as a quiet work zone during the day and a family lounge at night when it includes layered lighting, closed storage, and furniture that can shift easily. Leave paths wide enough for furniture delivery and future equipment maintenance.
Select Suitable Materials
Below-grade spaces call for durable, moisture-aware choices. Consider hard-surface flooring or other products intended for basement use instead of materials that can swell or hold moisture against a concrete slab. Area rugs can add warmth while remaining easier to remove and dry than wall-to-wall carpet.
Use insulation and wall assemblies appropriate for masonry or concrete conditions. Choose washable paint near laundry areas or wet bars, and include removable access panels near cleanouts, shutoff valves, and junctions that may need service later.
Improve Light, Airflow, and Energy Comfort
Comfort involves more than thermostat settings. Combine general ceiling lighting with task lights, wall lights, and dedicated stair lighting. Light-colored walls and reflective finishes can help distribute available light, while rugs, acoustic panels, and insulated interior walls can soften sound.
Before closing ceilings, review supply and return vents, seal accessible gaps around utility penetrations, and make sure the remodeled area will receive appropriate airflow. A basement that is dry but stale will still be less inviting than one with balanced light, air movement, and temperature.
Build a Practical Budget
Separate the budget into clear categories: design and permits, drainage or repairs, framing and insulation, electrical and HVAC work, plumbing, finishes, flooring, lighting, storage, and furnishings. Include a contingency fund for conditions found behind walls or beneath old flooring. This approach makes it easier to protect essential work from being reduced to pay for cosmetic upgrades.
Manage Work in the Right Order
- Inspect the space and document moisture or structural concerns.
- Finalize the intended uses, layout, and access needs.
- Confirm permits and complete drainage or repair work.
- Rough in plumbing, electrical, heating, cooling, and ventilation.
- Install framing, insulation, fire blocking, and approved moisture controls.
- Complete required inspections before closing walls and ceilings.
- Install finishes, fixtures, doors, storage, and flooring.
- Test alarms, outlets, drains, fans, lights, and mechanical equipment.
Final Basement Remodel Checklist for Charlotte Homes
- All moisture problems have been corrected before finishes were installed.
- Sleeping areas have appropriate emergency escape provisions.
- Mechanical equipment, panels, shutoffs, and drains remain accessible.
- Flooring and wall finishes suit the basement environment.
- Stairs, storage areas, and work zones have sufficient lighting.
- Required permits and inspections have been completed.
A successful Charlotte basement remodel follows a clear order: inspect first, control moisture, plan for safety, then create a layout that supports real life. With durable materials and accessible building systems, the finished space can remain useful and comfortable for years.

